Swamp Cooler Mold Prevention for Las Vegas Homes
If you cool your Las Vegas home with a swamp cooler, you own a machine whose entire job is to add water to the air. That is wonderful for a 108-degree afternoon and quietly dangerous for the building around it. An evaporative cooler works by pulling outside air through wet pads, and the same moisture that chills your living room can settle into ducts, attics, and ceilings where mold is happy to move in.
Swamp cooler mold prevention is not complicated, but it is unforgiving of neglect. The difference between a cooler that runs clean for fifteen years and one that seeds a musty, spore-laden attic usually comes down to a handful of habits: keeping the pads and pan clean, catching overflow before it soaks the ceiling, and shutting the unit down correctly at the end of the season. This guide walks through how evaporative coolers feed mold, what maintenance actually stops it, and a clear prevention checklist you can run yourself. We are Mold Eliminators, a Las Vegas firm that has worked on more than 255 properties since 1996, and we would rather teach you to keep mold out than be called after it arrives.
How an evaporative cooler feeds mold
Mold needs three things to grow: organic material to eat, the right temperature, and moisture. A Las Vegas home supplies the first two on its own. Drywall paper, wood framing, dust, and attic insulation are all food, and our climate keeps interior surfaces in the comfortable range mold prefers. Moisture is the one ingredient nature withholds in the desert, which is exactly why our outdoor air stays so dry and why mold is comparatively rare here. A swamp cooler removes that protection on purpose. It takes bone-dry desert air, drives it through saturated pads, and pushes humid air into the house at a steady rate for hours a day.
That humid air has to go somewhere. In a properly balanced system it sweeps through open windows and leaves, carrying its moisture out with it. When windows are closed too far, when the ductwork sweats, or when the cooler sits directly on the roof above an attic, the moisture condenses on cooler surfaces instead of exiting. Those damp surfaces, ceiling drywall, duct boots, attic sheathing, are where colonies start. The cooler itself is also a wet, shaded box full of dust and mineral scale, which makes it a breeding ground that then blows spores indoors. If you have ever noticed a faint musty smell the first week you switch the cooler on, that is the pads and pan, not your imagination.
The most common path from cooler to mold problem, though, is not slow condensation. It is water. A float valve that sticks open, a cracked supply line, or a clogged drain lets the pan overflow, and that water follows the roof framing straight into the ceiling below. We cover that failure in depth in our guide to swamp cooler leaks and ceiling damage, because a single overnight overflow can soak enough drywall to start a colony within the 24–72 hour window that decides whether a wet ceiling dries clean or turns into a remediation job.
Need help now?
Talk to a Las Vegas expert
In-house certified crews. One-hour emergency response across the valley, 24/7.
The maintenance that actually stops mold
Most swamp cooler mold prevention is ordinary maintenance done on schedule rather than when something breaks. The goal is simple: keep the water clean and moving, keep the pads fresh, and never let standing water sit. Stagnant water in the pan is where bacteria and mold bloom first, and a cooler that recirculates dirty water is essentially misting that contamination into your home.
At startup each spring, replace the cooler pads rather than reusing last year’s. Old aspen or cellulose pads hold mineral scale and trapped organic matter that mold feeds on, and fresh pads cost far less than a ceiling repair. Flush the pan, clean out sediment, and check that the float valve shuts the water off at the correct level so the pan cannot overflow. During the season, run a bleed-off or purge line so mineral-heavy water drains away instead of concentrating in the pan. In hard-water Las Vegas, scale builds fast, and scale is both a mold habitat and the reason float valves stick.
The cooler shares responsibility with the rest of your air system. If the same home runs central air at other times, the ducts that carried humid cooler air can hold residual moisture and dust, which is why we treat evaporative cooling and forced air together in our overview of HVAC and air duct mold. Clean pads on a dirty duct system only solves half the problem.
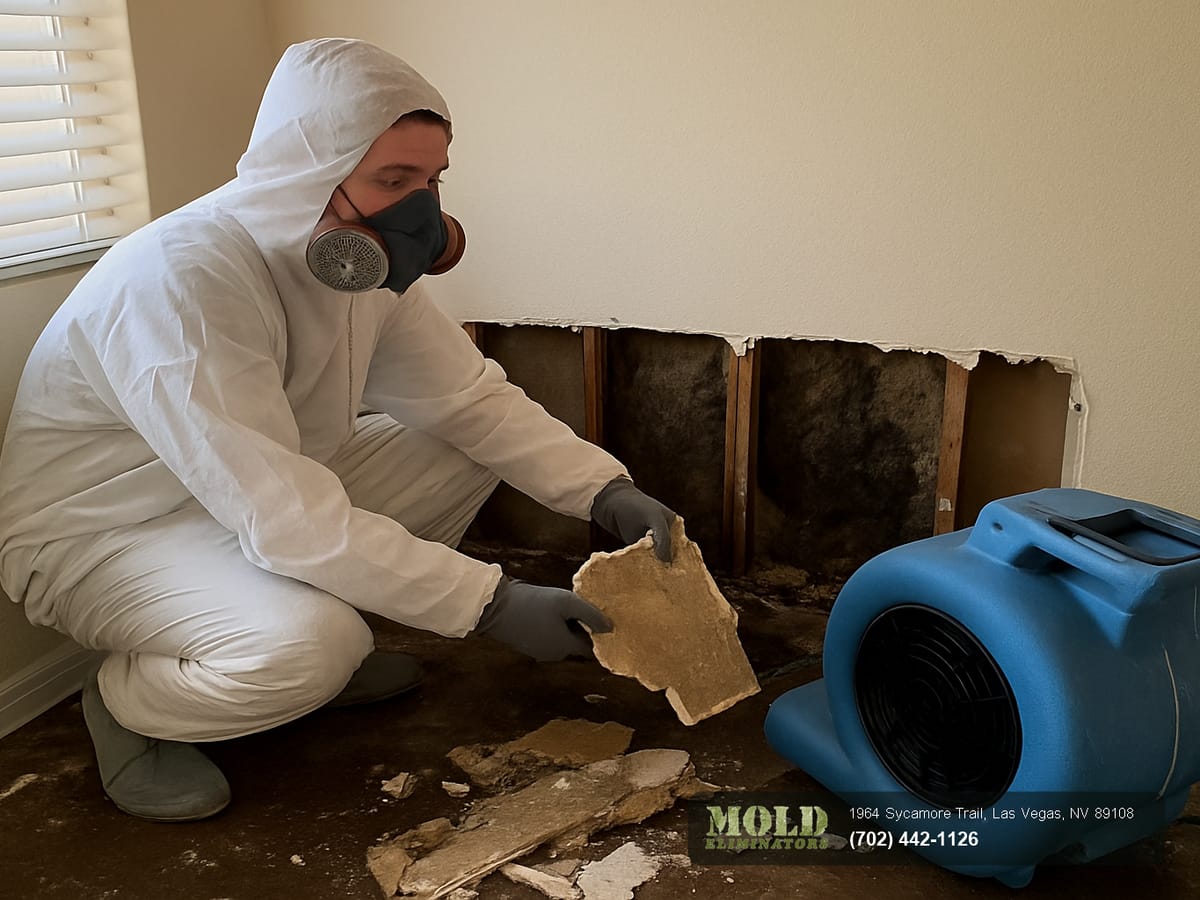 Rooftop evaporative swamp cooler being serviced on a Las Vegas home
Stopping overflow before it reaches the ceiling
Overflow is the failure that turns a maintenance lapse into a mold emergency. A swamp cooler holds several gallons of standing water at all times, and that water sits directly above your living space. When the float valve fails to close, water rises until it spills over the pan lip, runs along the roof deck, and finds the path of least resistance into the ceiling. Because it happens slowly and often overnight, the first sign is usually a brown stain or a sagging patch of drywall, by which point the cavity above is already wet.
If you find a ceiling that is already wet, the clock matters more than anything else. Wet drywall and framing need to be dried to a verified standard fast, because materials that stay damp past roughly 72 hours move from a drying job to a removal job. The right response is controlled structural drying with moisture readings, not a fan pointed at the stain and a hope that it dries on its own.
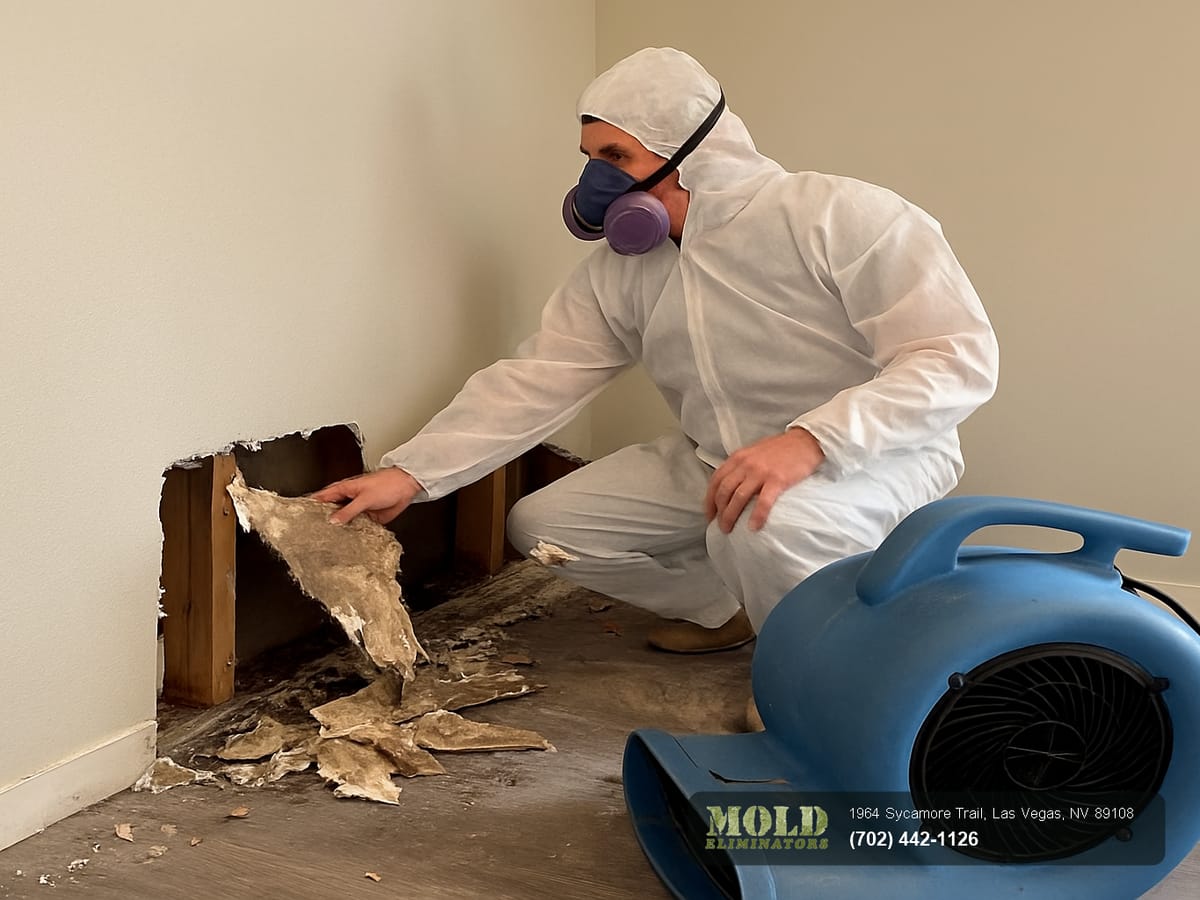 Seasonal shutdown of a rooftop swamp cooler before switching to refrigerated air
The switchover step almost everyone skips
The most overlooked moment in swamp cooler mold prevention is the end of the season. When the weather cools and you switch over to refrigerated air or simply stop using the cooler, a unit left wet becomes a sealed, dark, humid box for months. By the next spring it can be lined with mold and mineral sludge, and the first warm day blows all of that into the house.
Switching over correctly takes a half hour. Shut off the water supply to the cooler at its valve, drain the pan completely, and let the pads and interior dry fully before you cover the unit. Disconnect or drain the supply line so it cannot freeze and crack over winter. Install a tight cooler cover so monsoon rain and blowing dust stay out of a unit that is no longer flushing itself. A cooler that is shut down dry and covered starts clean in spring; one drained halfway and left open is a colony waiting to happen.
The same logic applies in reverse at startup. Before the first run of the season, open the cooler, inspect for any growth that took hold over winter, and clean it out before you energize the water. If you ever open a cooler to a strong musty smell or visible black or green growth, stop and get it assessed rather than running it, because a running cooler will distribute whatever is inside it throughout your home.
Your swamp cooler mold prevention checklist
Run this sequence at spring startup, mid-season, and fall shutdown. None of it requires special tools, and together it removes nearly every path that lets an evaporative cooler feed mold.
- Replace the pads. Fresh pads every spring. Scaled, matted pads hold organic matter and breed mold.
- Clean and flush the pan. Remove sediment, scrub mineral scale, and confirm there is no standing sludge before you add water.
- Verify the float valve. Lift it and confirm a clean shutoff. Clean or replace anything that trickles or sticks.
- Clear the overflow and bleed lines. Make sure the pan can drain and that a purge line is carrying mineral-heavy water away.
- Inspect supply line and roof seal. Look for cracks, drips, and failed flashing where the unit meets the roof.
- Balance your airflow. Crack windows so humid air actually exits the house instead of condensing in ceilings and ducts.
- Shut down dry. At season’s end, cut the water, drain fully, dry the interior, and cover the unit before winter.
- Smell-check at every step. A musty odor is your earliest warning. Trust it and investigate before you run the unit.
This routine is the calm, anti-upsell approach we believe in. We would honestly rather you never need us, and a homeowner who runs this checklist usually will not. Our founder, Craig Herrmann, co-authored the ANSI/IICRC S520 mold standard that the remediation industry works to, and the prevention principle behind that standard is the same one above: control moisture and you control mold. You can read more about Craig and the S520 standard if you want to understand the technical basis for these steps.
When prevention is not enough, call the right crew
Built on the standard
Craig Herrmann is an IICRC Master Certified Flood Expert and co-author of the ANSI/IICRC S520 standard, 4th Edition 2024. Your home is assessed and treated by the rulebook, not by guesswork.
In-house, no subcontractors
Every technician is a certified W-2 employee, not a subcontracted crew. One team owns the moisture problem from the first reading to the verified-dry finish, with one-hour emergency response, 24/7.
We tell you the truth
If your cooler-related dampness is a quick fix you can handle yourself, we will say so. We tell people when they do not need us, because trust is worth more than a single invoice.
If a swamp cooler has already left a stain, a smell, or a wet ceiling, do not wait for it to spread. A fast, factual assessment tells you whether you have a simple dry-out or a hidden colony, and either way you will know exactly where you stand. The same in-house crew that dries the structure verifies the result with an independent third-party lab, so the answer is data rather than opinion. The honest first step is a free inspection of the affected area before any work is quoted.
Swamp cooler mold prevention, common questions
- Does a swamp cooler cause mold in a Las Vegas home?
- It can, if it is neglected. A swamp cooler adds moisture to dry desert air on purpose, and that moisture is the one ingredient mold normally lacks here. A well-maintained cooler with clean pads, balanced airflow, and no overflow is safe. A cooler with standing water, stuck float valves, or poor air exit is a reliable way to start a problem. Maintenance is what separates the two.
- How often should I clean my swamp cooler to prevent mold?
- At minimum, three times a year: a full clean and pad replacement at spring startup, a mid-season flush and float-valve check, and a complete dry shutdown in fall. In our hard-water valley, a mid-summer pan flush is also wise because mineral scale builds quickly and scale is both a mold habitat and the reason float valves stick open.
- Why does my swamp cooler smell musty when I turn it on?
- That odor is almost always the pads and pan. Over a shutdown or a few stagnant days, water in the pan and moisture in the pads grow bacteria and mold, and the first airflow blows that smell indoors. Replace the pads, flush and scrub the pan, and the smell usually clears. If it persists, the growth may have moved into ducts or the attic, and that is worth inspecting through our air duct guidance.
- My cooler overflowed and stained the ceiling. What now?
- Treat it as time-sensitive. A stained or sagging ceiling means water reached the drywall and likely the framing above, and damp material past roughly 72 hours moves from a drying job to a removal job. Stop the overflow source, then get the cavity dried properly with moisture readings. Our guides to swamp cooler leaks and structural drying explain the response in detail.
- Is it safe to switch from a swamp cooler to refrigerated air?
- Yes, and doing it correctly is a key prevention step. Shut off the cooler’s water, drain the pan, dry the interior, and cover the unit before it sits idle for months. A cooler stored wet becomes a sealed mold box that contaminates the home the next time it runs. A cooler stored dry and covered starts clean.
- Do I need professional help, or can I prevent this myself?
- Most swamp cooler mold prevention is genuinely do-it-yourself maintenance, and we would rather you handle it. Call a professional when you find visible growth, a wet ceiling, or a musty smell that does not clear after cleaning. At that point a free inspection tells you whether you have a simple cleanup or a hidden problem before you spend a dollar on remediation.
How a swamp cooler leak causes water damage
An evaporative cooler, what most Las Vegas homeowners call a swamp cooler, works by pulling outside air through wet pads and blowing the cooled air into the house. To do that it needs a constant supply of water: a float valve keeps a reservoir pan filled, a small pump circulates that water up over the pads, and a supply line feeds the whole thing. Every one of those parts is a potential leak point, and they all sit on your roof in full desert sun.
The most common failures are a stuck or worn float valve that lets the pan overflow, a rusted or cracked pan that seeps from the bottom, a pump or distribution tube that sprays water past the pads, and a supply line fitting that drips. Because the unit runs for hours every day through the cooling season, even a minor drip adds up to gallons over a week. That water follows gravity into the ceiling and wall assemblies below, soaking paper-faced drywall, wood framing, and insulation. Those are all organic materials, which means they are food for mold once they stay wet.
Las Vegas adds its own twist. Our intense roof heat speeds up corrosion on metal pans and fittings, and the same dry desert air that makes evaporative cooling work also fools people into assuming a wet ceiling will simply air out on its own. It often does not. Water that wicks into a wall cavity or pools above a ceiling can stay trapped well after the surface looks dry, which is the same hidden-moisture trap that makes proper structural drying so important after any water event.
Signs a swamp cooler leak has caused damage
Because the leak is usually slow and overhead, the warning signs tend to show up indoors before anyone climbs onto the roof. Knowing what to look for helps you catch a problem while it is still small.
The honest truth is that none of these signs are required for real damage to be present. Plenty of soaked ceiling cavities give no surface clue at all until the problem is well advanced. That is why the only way to know for certain is to inspect and measure the affected area rather than guess from the paint. If you suspect a past or present cooler leak, our free inspection for property owners is the calm, factual way to find out what the moisture left behind.
What to do next
If you find an active swamp cooler leak, the first move is to stop the water. Shut off the cooler and close its water supply valve so the pan stops filling. That alone halts the flow and buys you time to assess the damage instead of watching it grow.
Next, resist the urge to assume it will dry on its own. A wet ceiling that looks dry on the surface can stay saturated inside for weeks, and our dry desert air does not reach trapped moisture the way it reaches an open surface. The materials need a measured dry-out, not a hopeful wait. Within roughly 24–72 hours of getting wet, organic building materials can begin to grow mold, so the window to dry and save them is short. If water is actively spreading, that is an emergency, and the right move is to call us so we can stabilize the water first.
From there, the job is straightforward when handled correctly: map the moisture to find every wet area, dry the structure to a documented standard, and verify the result before repairs. When the leak has been steady and contaminated by a corroded pan or standing water, or when it overlaps with broader roof or plumbing intrusion, the work can extend into full flood restoration. Either way, the priority is the same: find the water you cannot see, remove it, and prove the structure is dry so the problem ends here instead of returning as mold.
One clarification worth making, since people often ask: the on-site inspection is the free part. If lab analysis is warranted, samples go to an independent third-party lab, billed at cost. We tell you plainly when testing is and is not needed, because guessing helps no one and we do not upsell work you do not require. Health and standards questions like this one are answered the same way our founder Craig Herrmann answers them, by the rulebook, since he co-authored the ANSI/IICRC S520 mold standard the industry follows.
Related questions
- Does a leaking swamp cooler always lead to mold?
- Not always, but the risk is real and time-sensitive. Mold needs a wet organic surface to grow, and a slow cooler leak provides exactly that. If the leak is caught early and the structure is dried to a verified standard within the first day or two, you can often prevent mold entirely. Leave the materials damp and you have effectively scheduled a mold problem for later. The deciding factor is how fast the moisture is found and removed, which is why a prompt free inspection matters more than the size of the original drip.
- How do I know if my ceiling is dry after a cooler leak?
- You measure it rather than judge by appearance. Moisture meters read the actual moisture content inside drywall and framing, and thermal imaging reveals cool, wet zones hidden above the ceiling. We compare those readings against unaffected reference areas to set a real dry target, then confirm the structure has reached it before any repairs go in. Proper structural drying ends on the data, not on a surface that merely feels dry to the touch.
- Will my insurance cover swamp cooler water damage?
- It depends on the cause and your policy. Damage from a sudden, accidental failure is more often covered than damage from a slow leak that went unaddressed over time, which is one more reason to act quickly and document everything. A clear moisture map and photos from the first visit are exactly what an adjuster wants to see, and they are part of how we approach every water damage restoration job. We log the readings and scope and work directly with your carrier so the claim rests on evidence, not guesswork.
Why swamp coolers cause mold in the desert
An evaporative cooler works by pulling hot, dry outside air through wet pads. The water evaporates, the air cools, and that cooler, more humid air gets pushed into your home. It is genuinely efficient for our climate. The catch is the part of the cycle most people never think about: the cooler is deliberately keeping cellulose pads, a metal water pan, and the surrounding ducting damp for months at a time. Damp organic material plus warm air is the textbook recipe for microbial growth.
A few specific failure points show up again and again on Las Vegas roofs and in valley homes:
The reason this catches homeowners off guard is the same reason evaporative cooling works here at all. Our outdoor air is so dry that surfaces appear to dry quickly, so a musty cooler often gets blamed on dust or stale air rather than active growth. The moisture is real, it’s just hidden inside the pads, the pan, and the ducting where you never look.
Signs your swamp cooler may be the source
You don’t need to be a technician to spot the early warnings. The most reliable one is your nose. If a musty, damp, earthy smell rolls through the house when the cooler kicks on, that odor is usually the cooler itself or the ducting downstream of it, not the rest of the home. Other common clues include allergy-style symptoms (congestion, irritated eyes, a scratchy throat) that ease when you leave the house and return when the cooler runs, visible dark speckling on or around the vents, and water stains on the ceiling near the unit or along a duct run.
None of these are a diagnosis on their own. Dust, hard-water minerals, and ordinary stale air can mimic the smell, and not every dark spot is mold. That uncertainty is exactly why guessing is the wrong move in either direction: tearing the cooler apart in a panic wastes money, and ignoring a real problem lets it spread into the structure. The honest path is to have someone look at the actual moisture and the actual material, then decide based on what’s there.
Worried your cooler started a mold problem? Get a free inspection.
No pressure and no upsell. If it is a quick fix, we will tell you. One-hour emergency response, 24/7, across the Las Vegas valley, with results verified by an independent third-party lab.